Pre-press is the most important stage before the printing process. Please follow our recommendations closely to:

  • avoid mistakes in the file preparation process,

  • choose an appropriate colour profile,

  • gather other very useful pre-press information.

1. Before exporting files to PDF

Read more

2. InDesign settings for exporting files to PDF

Read more

3. Pageproofs

Read more

4. How to prepare endpapers

Read more

5. How to prepare files with language change

Read more

6. What is included in standard file check?

Read more

7. ICC profiles and InDesign job options

Read more

8. ISBN barcode generator

Read more

9. What is a valid colour reference for printing

Read more

10. How to prepare files for a board book

Read more

  • Size of all pages must be equal according to order - if book is ordered in size of 210x297, this size must be defined in document properties.
  • File should be prepared with crop marks (this can be applied automatically before exporting file to PDF).
  • Bleed size for every document must be applied: contents, soft covers and endpapers – 3mm, hard covers – 18mm.
  • Correct color space must be applied. CMYK, or Grayscale is acceptable. Files must be prepared according to ISO12647-2:2013 standard, Output Intent information must be provided in PDF file or corresponding information about color profile used must be attached to PDF file. ICC profiles can be downloaded on our website.
  • All spot colors should be converted to CMYK, if not intended to be printed as separate Pantone colors. RGB or Lab colors are not allowed in offset printing.
  • 100% black must be applied for Foil, UV spot, Embossing files. Objects of these files must be converted to outlines.
  • Every part of the book should be saved as separate files: separate content file, cover file, endpapers, foil, UV spot, etc.
  • Contents should be saved as single PDF file containing all pages from first to last in correct sequence. PDF file can be divided in one, or more parts, if PDF file exceeds more than 4 GB. Files must be named according to sequence: “book_001-120.pdf”, “book_121-248.pdf”.
  • Text, numbers and important design objects should not be placed closer than 3 mm to page edges.
  • To prevent too high ink coverage, correct ICC profiles must be applied according to selected paper
  • Correct resolution of color pictures is 300 dpi, for bitmap files 600 dpi.
  • All fonts have to be embedded.
  • If endpapers are ordered as selfends, endpapers should be included in content file.
  • Blank pages have to be included in the content file.
  • Fine black objects (texts, lines, tables) should be 100% black. RGB or Registration color is not allowed for offset printing.
  • Line width should not be less than 0,2 pt.
  • All 100% of black objects (text and vectors) overprint will be applied automatically in file ripping process.
  • Do not to use white objects in overprint mode and don't play with object overprint settings as long as it's really necessary.
  • Do not use JPEG2000 compression.
Last update: 2024.02.21.


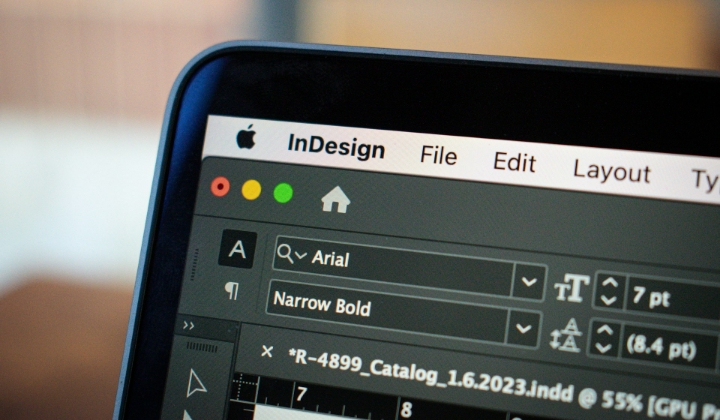
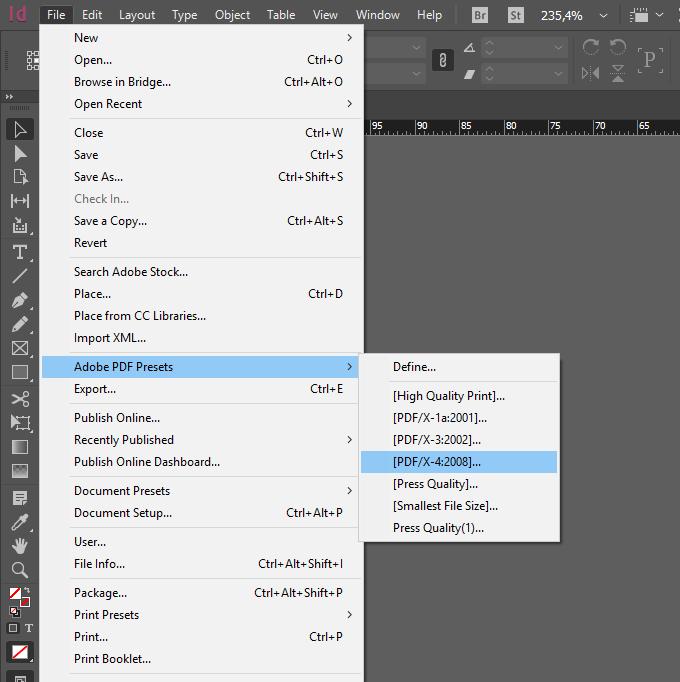
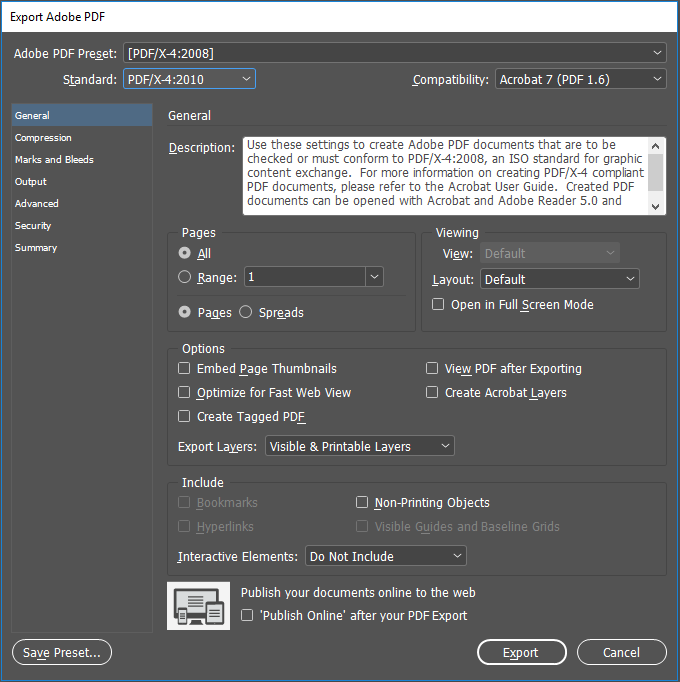
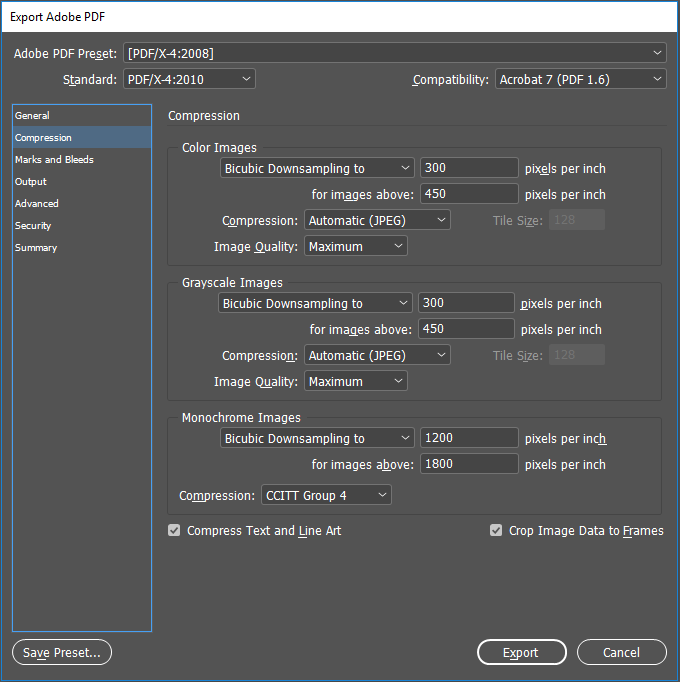
To export created layout to PDF correctly, in InDesign choose File -> Adobe PDF Presets -> PDF/X-4
 

GENERAL All settings can be left as default


COMPRESSION All settings can be left as default


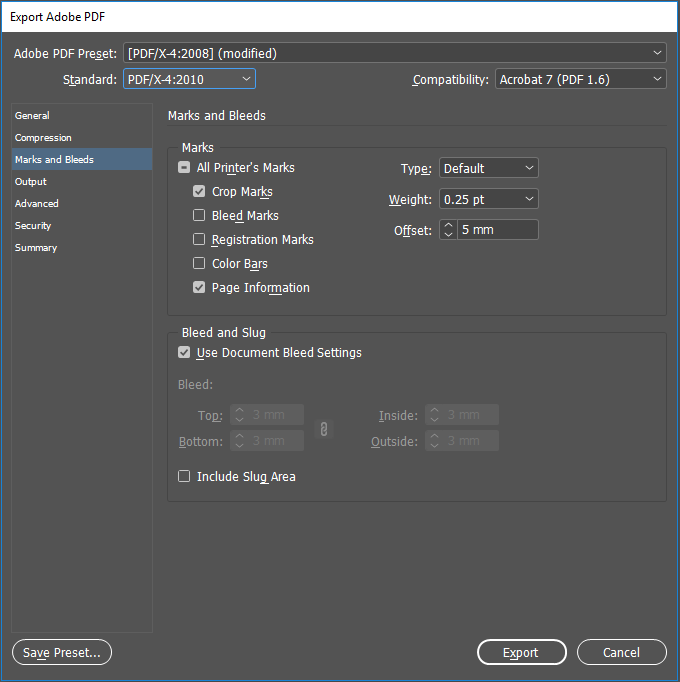
MARKS AND BLEEDS Check Boxes for Crop marks and Page Information must be checked. Offset must be applied 5 mm. Check Box must be checked for document bleeds. If document has a bleed size defined, it will appear automatically in bleed section in gray. Bleed size must be at least 3 mm for content pages and 18 mm for hard cover file.


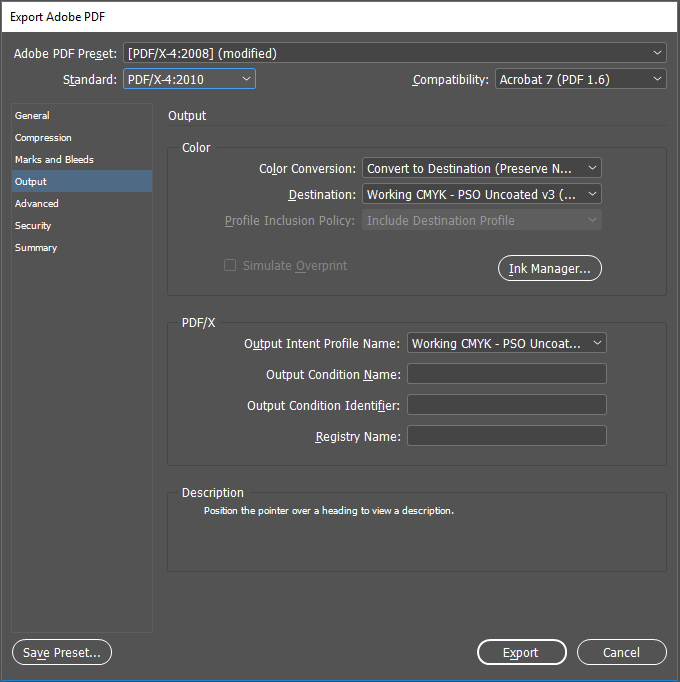
OUTPUT Color conversion: Convert to destination (Preserve Numbers), Destination: .icc profile according to selected paper (see Downloads section).

Last update: 2017.07.07.

Instead of hard-copy printouts of PDFs, a faster and easier method is to check page proofs (also called soft proofs).

Our prepress department checks all received files and adjusts to our technical requirements before running a print. 
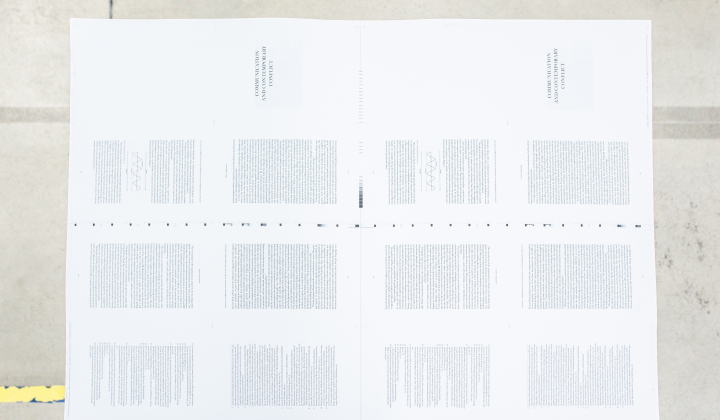
To demonstrate how the printed book contents will look, we always send a page-proof PDF to the customer. Only when the customer has approved the page proofs will the production start.

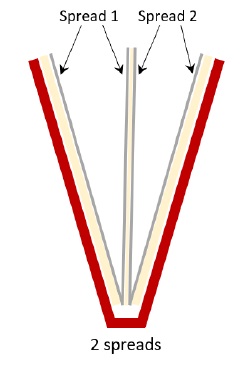
Our page proofs are provided in spreads allowing you to see the file as an open book and to check both the contents and the page sequence.

If you discover errors in the page proofs, please re-submit the complete content file (from first to last page) including corrections.

To see the content of PDFs correctly, you must always use the latest version of Adobe Acrobat or Acrobat Reader. It is possible to download and install this software free of charge on nearly any platform.

Using the latest Acrobat/Acrobat Reader version is the only way to be sure you see all texts, objects, bleeds, overprints, extracted or added hidden and unnecessary objects, and possible glitches. And to see all of them the way it will be printed.


Overprint preview
Ensure that your workstation has an overprint preview set on when checking page proofs. In Acrobat, choose EditPreferencesGeneral. On the left side of the dialogue window, look for Page Display and then set Use Overprint Display to Always. This setting will help visually identify typical overprint problems and check the trapping of the objects.

Please do not check files in a web browser or mobile device. Mobile device rendering engines and built-in browser PDF viewers do not support overprint previews.

As an additional safety measure, we have introduced a control mark that appears in the files that are sent for approval. 


A page-proof is not a colour reference 
By default, we are downsampling all images to 72 dpi in page-proof files to save bandwidth and transfer time. 
Due to the low resolution page-proof is not a colour reference. The page-proofs allow to ensure the correct placement of text and objects, also the page sequence.

We can provide a high resolution pageproof file on demand.
For correct image proofing we recommend to order physical ISO certified Epson proofs (involves extra cost).

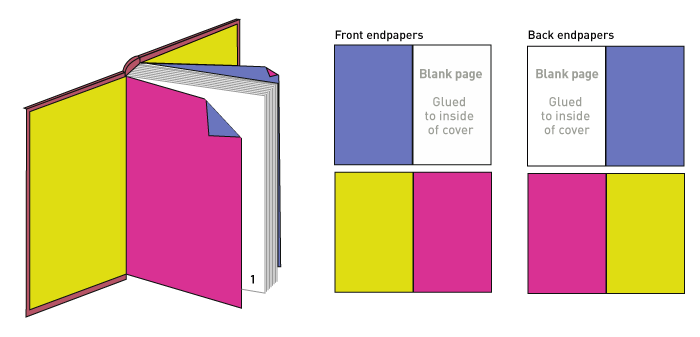
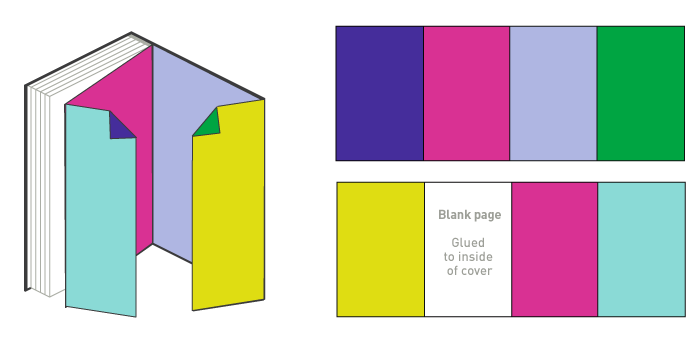
Images showing the endpapers as spreads in files and how the same files look glued as endpapers in a book.

Standart endpapers
Standard endpapers


Endpapers with flaps


When ordering a book with several language editions, please provide:

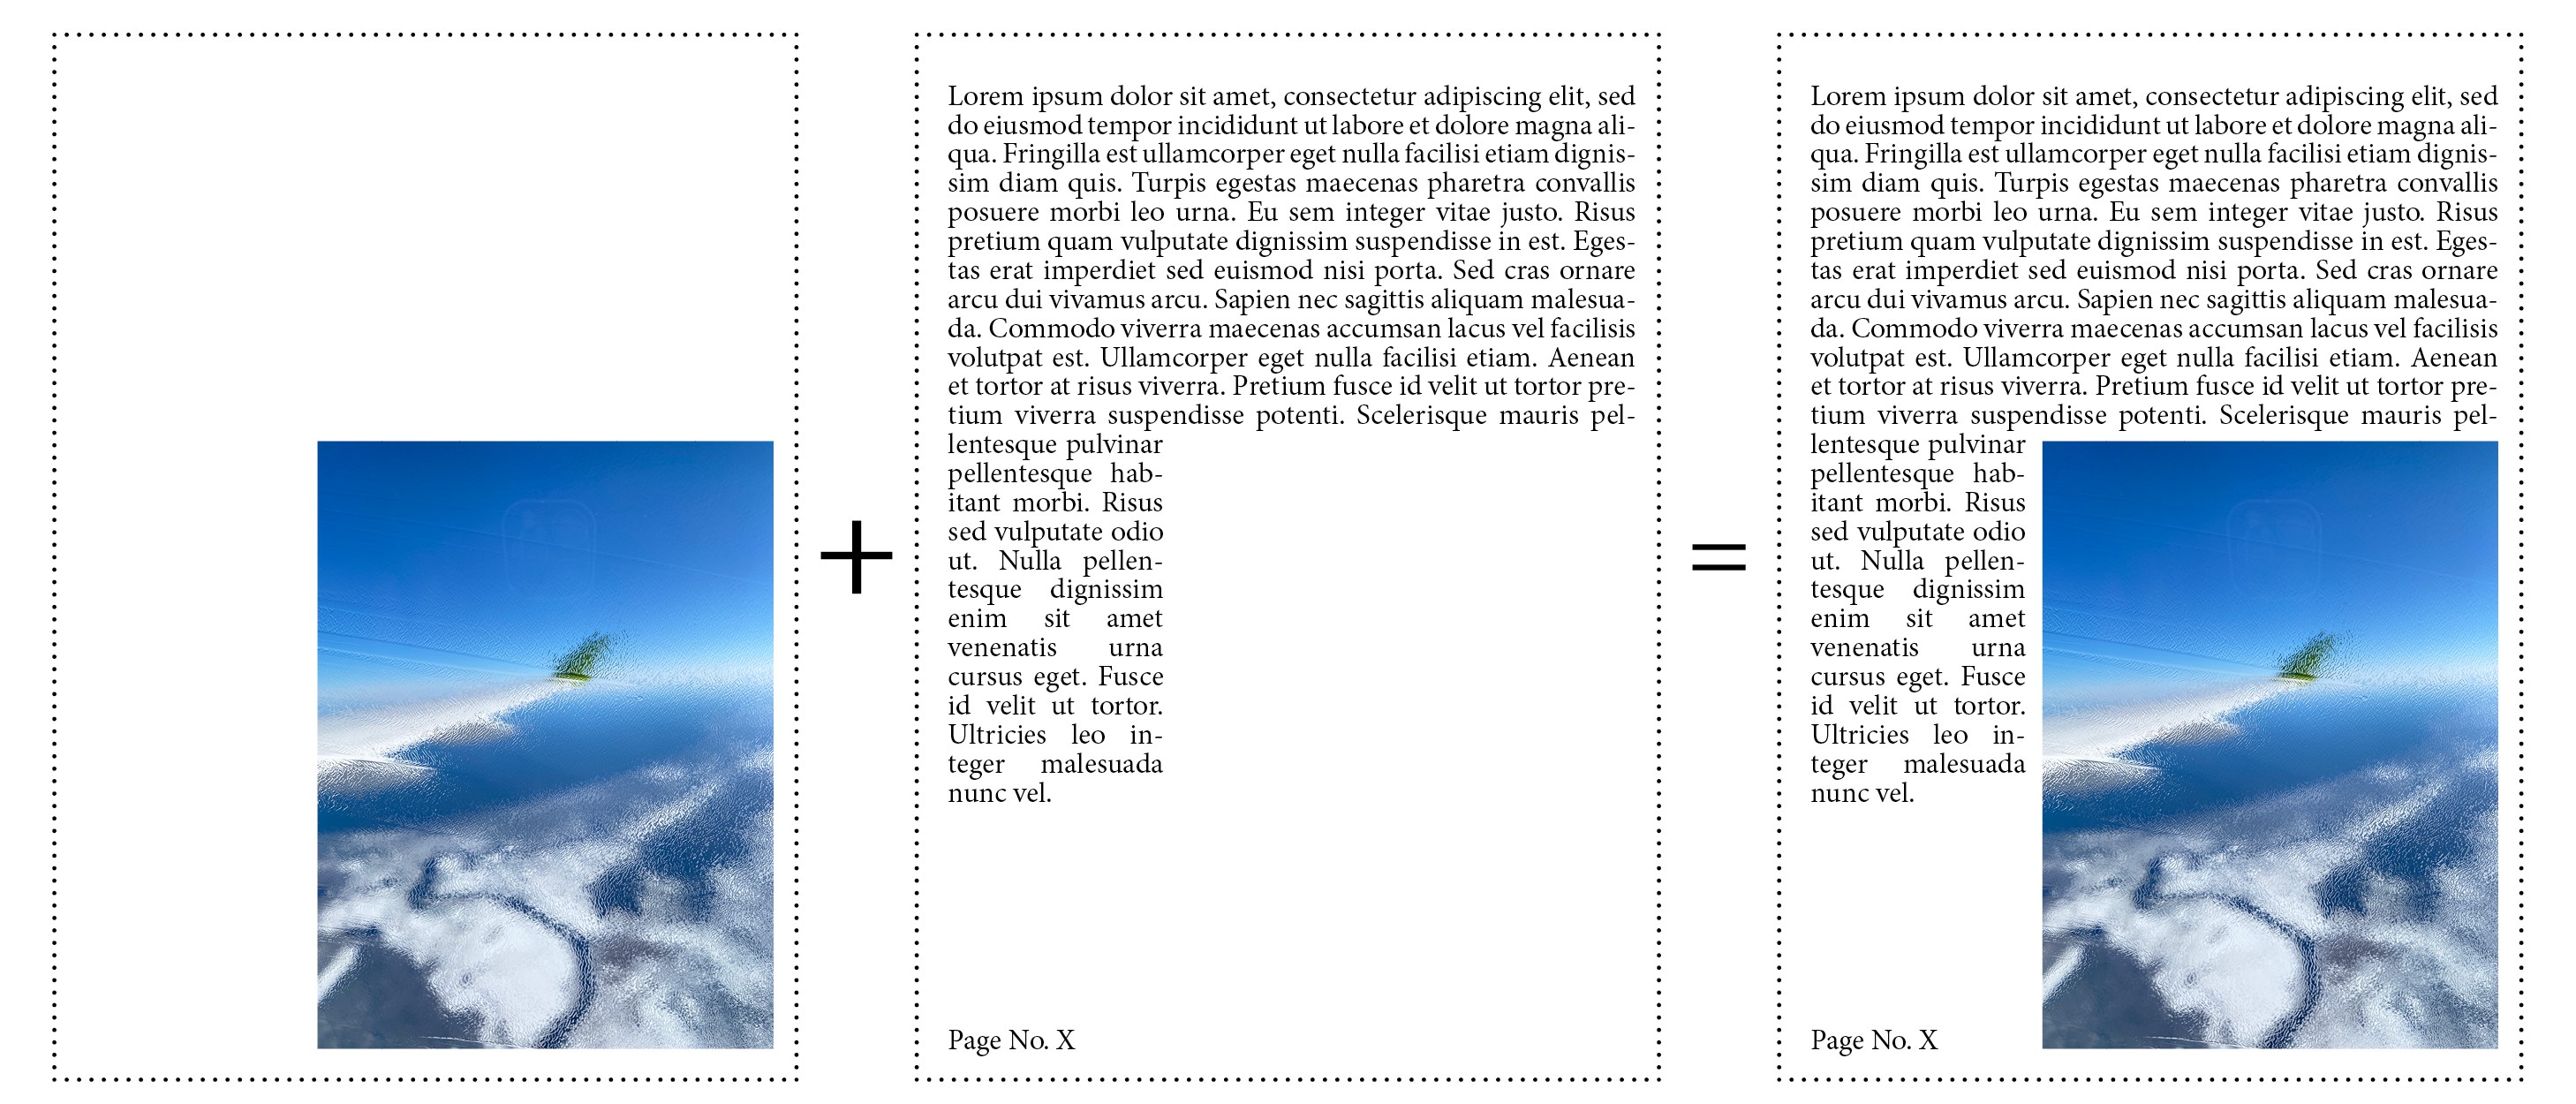
  1. A separate PDF file with CMYK pictures/illustrations as a single PDF file from the first to the last page.

  2. A separate PDF file with text and black objects (all 100% black, vector objects only) for each language edition as a single PDF file from the first to the last page. Please define all objects in the text file with the Overprint setting turned ON.

If you discover errors in the print files after submitting them, please re-submit the complete content file (from first to last page) including corrections.

After receiving the PDF files, the Prepress department will check the following:
                • Submitted file format. It must be a PDF file only.
                • File size according to the selected final format.
                • Resolution of illustrations. (Illustrations intended for printing must be prepared at no less than 240 dpi. In some cases, when there are insignificant objects, the resolution may be lower, but not less than 150 dpi.)
                • The colour space and if black texts contain black colour only
                • Total Ink Limit

The Prepress department does not check:
                • Bleed Size is not checked for each individual page of all files.
                • Prepress department does not check, or treat objects with Overprint turned on as errors.
                • For the orders with language change Prepress department does not check files after combining illustrations and text.


ICC profiles

PSO Coated v3 by ECI (FOGRA51) for coated paper
PSO Uncoated v3 by ECI (FOGRA52) for uncoated paper
 

InDesign job options

Coated_Paper_Fogra51.joboptions for coated paper
Uncoated_Paper_Fogra52.joboptions for uncoated paper
 

How to install a color profile

• In Windows, right-click a profile and select Install Profile. Alternatively, copy the profiles into the WINDOWS\system32\spool\drivers\color folder.

• In Mac OS, copy profiles into the /Library/ColorSync/Profiles folder or the /Users/[username]/Library/ColorSync/Profiles folder.

After installing color profiles, be sure to restart Adobe applications.

Last update: 2017.06.22.


Enter ISBN code to create a print-ready vector barcode in PDF format. You can use spaces, dashes or any other symbols as separators for 13-digit code. Dashes according to ISO standard will be added automatically. Font is embeded in PDF file.


ISBN code
Create PDF


Please test the barcode to make sure it works before you prepare layouts for printing. There are many smartphone apps that read barcodes and you can scan the barcode directly from computer screen.
Last update: 2016.07.28.

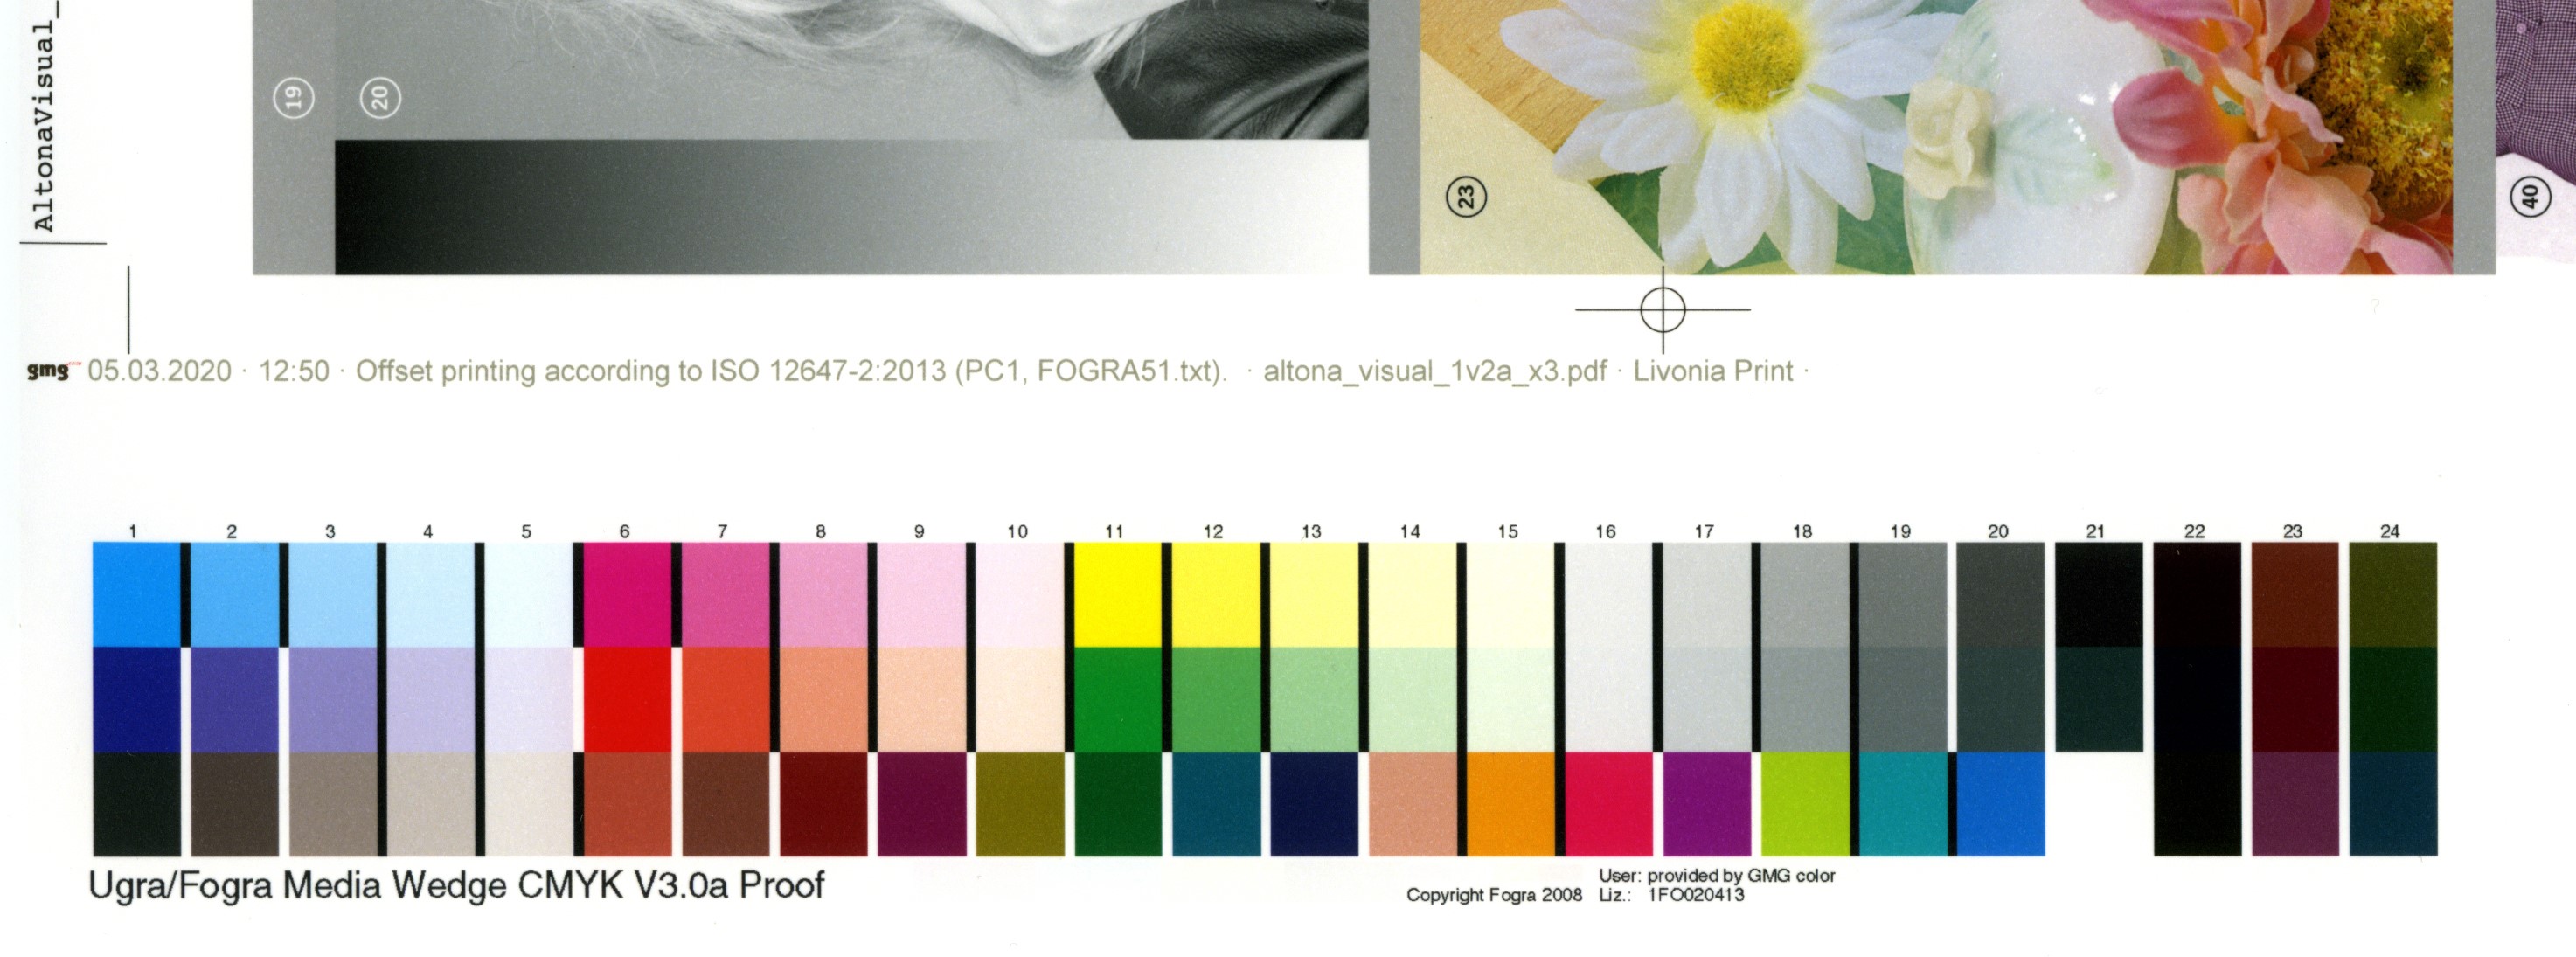
CRITERIA FOR COLOUR PROOF EVALUATION
 

1. Colour proofs should be printed on a suitable proof paper:

  • Reference proofs for printing on coated paper should be printed on Semimatt proof paper.

  • Reference proofs for printing on uncoated paper should be printed on Matt proof paper.

2. Colour proof should be printed from the file supplied to the printer as the ready-to-print PDF file.

3. Sizes of images on the proofs should match the printed result 1:1.

4. Each colour proof should include the following information:

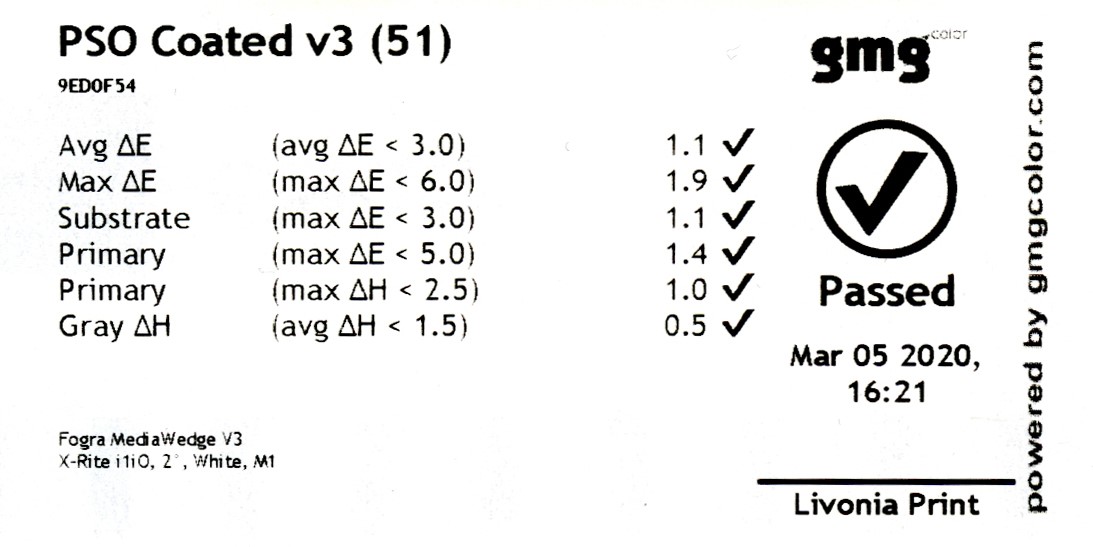
  • Date the proof has been printed

  • Name of the file printed

  • Applied printing standard

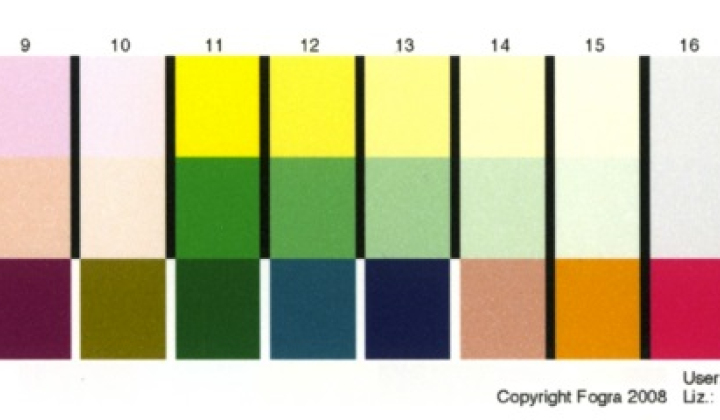
  • Ugra/Fogra Media wedge v2 or v3

  • Validation sticker that shows colour proof’s conformity with the chosen printing standard. 

If any of the above mentioned information is missing on the supplied colour proof, the proof does not comply with ISO standard and cannot be used as a valid reference for printing.
If there is an obvious mismatch between the colour proofs and the supplied printing files (objects that are only on files or only on printed proofs; file creation date is later than a date on proofs, etc), these proofs cannot be used as a valid reference for printing.
In case of doubts about the supplied colour proof quality, Livonia Print would print 1-3 Livonia Print ISO certified proofs to check the conformity. If proofs don’t match, it will be communicated to the client. If needed, Livonia Print colour proofs will be sent to the client for approval, extra charge may be applied.

ACCEPTANCE OF COLOUR PROOFS

  • If colour proofs and PDF files are supplied as PSO uncoated v2, prepared according to Fogra 29/30/47 standard and yellowish paper is selected for printing, the colour proofs can be accepted as a reference.

  • If colour proofs and PDF files are supplied as PSO uncoated v2, prepared according to Fogra 29/30/47 standard, but White/Uncoated OBA paper (Amber Graphic, Magno Natural) paper is selected for printing, the colour proofs are not valid as a reference due to different paper whiteness.
  • If colour proofs are supplied as PSO uncoated v2, prepared according to Fogra 29/30/47 standard, but pdf files are created according to PSO coated v3 Fogra 52, the colour proofs are not valid as a reference due to different print standards.
  • If colour proofs and PDF files are supplied as PSO uncoated v3 according to Fogra 52 standard, but Uncoated/Yellowish non-OBA paper is selected for printing, the colour proofs are not valid as a reference due to different paper whiteness.


CRITERIA FOR PREVIOUSLY PRINTED SAMPLE BOOK USE AS A REFERENCE FOR A NEXT REPRINT

All orders at Livonia Print are strictly printed according to ISO12647-2 standard. Therefore the only valid reference for first print or any reprint are only certified colour proofs printed according to the instructions described above.
Factors like, for example, changes in production of paper, ink and other material, or aging of paper and materials are often the reasons, why it is impossible to match the reprint to the previously printed sample.
If the client insists on using the previously printed sample book as a reference, the operator can try to adjust the colours, if differences are minimal. However, this kind of sample still is not considered as a valid reference for printing.
If a printing operator doubts a possibility of a close colour match, the printing process will be stopped for further communication, which would result in extra costs for the client.

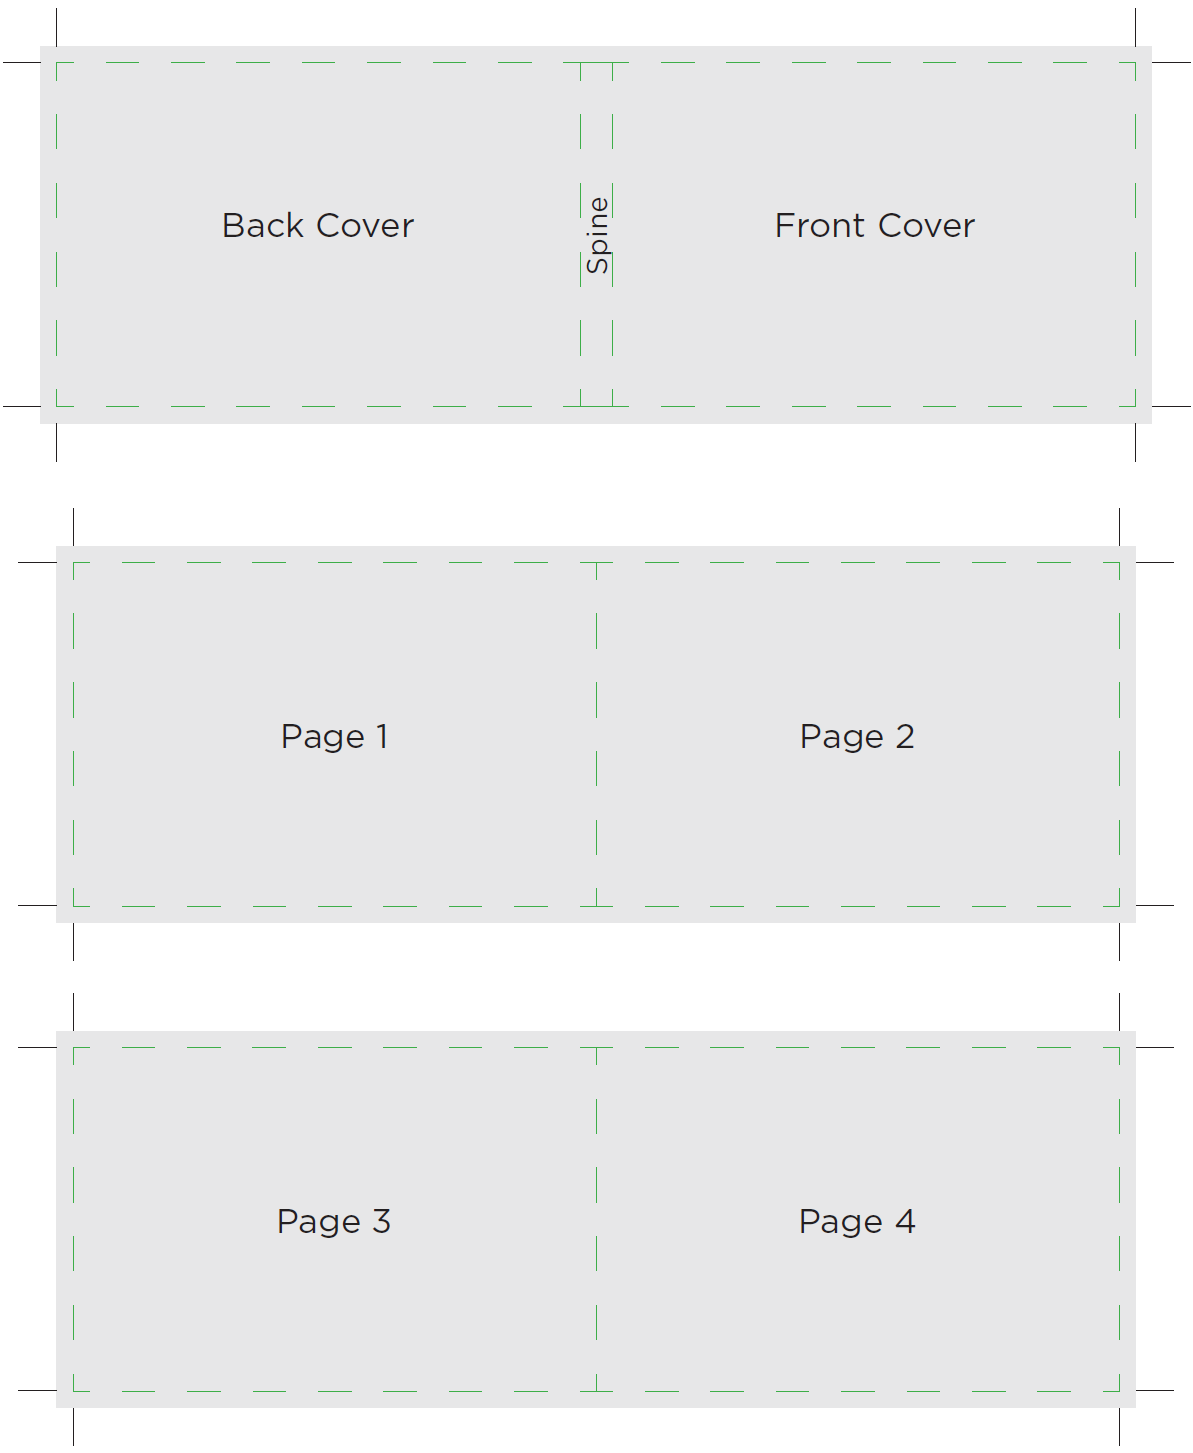
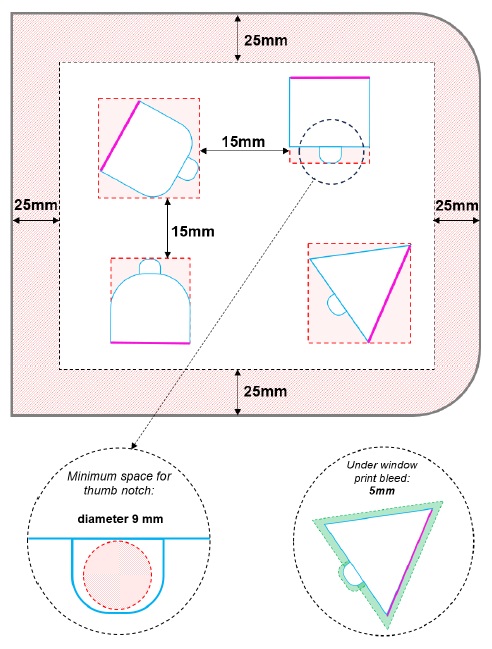
For Board book projects, preparing files in spreads and in the correct page sequence is essential. Please see the example here.